Monday, April 30, 2012

butterfinger truffles


recipe from http://www.recipegirl.com lets try for labor day people :)


Ingredients:


5 ounces semisweet chocolate (not exceeding 61% cacao), chopped
1/2 tablespoon unsalted butter
1/2 cup heavy whipping cream
3/4 cup chopped Butterfinger candy bars (about 4 ounces)
additional chocolate for dipping/coating
additional chopped butterfingers and/or sprinkles for decor

Directions:

1. Place chocolate and butter in a medium bowl. Bring cream to a boil by using a glass measuring cup in the microwave. Heat 1 to 1 1/2 minutes, or just until the cream begins to bubble. Pour the hot cream over the chocolate mixture. Let it stand for 1 minute, then stir until the chocolate is melted and the mixture is smooth. Stir in chopped butterfingers. Cover and chill until this mixture is firm (at least 2 hours- and up to 24 hours).
2. Line a rimmed baking sheet with waxed paper. Using a small spoon or melon baller, scoop 3/4-inch balls from the firmed-up chocolate mixture. Roll the chocolate gently between your hands to form a ball. It will be sticky and messy. Place it on the prepared sheet. Continue rolling until you have used up all of the chocolate. Place the rolled balls back into the refrigerator to firm them up again (about an hour).
3. Melt some additional chocolate in a small bowl. I just used more of the semisweet chocolate that I used for the truffles. If you melt 1 1/2 cups at a time, that should work out fine. Melting in the microwave works great- just melt in bursts of 45 seconds, stopping after each burst to stir until all is melted and smooth.
4. Remove the chilled chocolate balls from the refrigerator. Use a small spoon to dip the chocolate ball into the melted chocolate. Use another spoon to help cover the ball entirely in a layer of chocolate, and then gently place the chocolate dipped ball onto the waxed paper. Immediately sprinkle chopped butterfingers or decorative sprinkles on top. Continue with remaining chocolate balls and decor.
5. These truffles are best if kept refrigerated until they are ready to serve. They're not a great truffle for gifting in a box. When you bite into them, you will notice how delicate they are. They have a hard chocolate exterior, but when you bite into them the interior will melt right in your mouth. These are heavenly.

Tips:

*If you are preparing this recipe as gluten-free, just be sure to use a brand of chocolate that is designated as GF.
*If you don't wish to dip these truffles into chocolate, you may choose to roll them in unsweetened cocoa powder instead.
*The finished product will stay fresh and wonderful in the refrigerator for several days.


Kawaiii Cupcakes


Cupcakes
1 1/2 Cupcakes Flour
1 1/2 tsp baking powder
1/4 tsp salt
1 stick butter
1 cup sugar
2 eggs
1/2 tsp vanilla
1/2 cup milk
1/2 cup strawberry preserves


Frosting

1/2 stick butter
3 heaping T cocoa 
1/2 lb confectioner's sugar
1/2 vanilla
1/4 cup of milk

Mix flour, baking powder and salt. Beat in butter gradually. Beat in sugar and mix thoroughly. Beat in eggs then vanilla and milk. Beat until it mix. Fill cupcakes 1/3 full. Place a spoonful of preserver in the center. Cover with batter. Bake at 175  Celsius. 


For Frosting


Melt butter, in a separate bowl. Mix together cocoa and sugar. Add melted butter, vanilla, and milk and beat at low speed until mixed. Dip cupcakes in glaze and top with chocolate.

Friday, December 9, 2011

Strawberry Shortcake...

 another strawberry recipe will up soon..


Wednesday, December 7, 2011

chocolate + yellow


Snowy Strawberry


Ingredients

250g fresh strawberries
100g cream cheese
200g whipping cream
50g icing sugar
1 tbsp icing sugar, for decoration


Method

Mash the strawberries. Then put a teaspoon of mashed strawberries into a wine glass.Use a balloon whisk to mix cream cheese, icing sugar and whipping to a creamy texture.Put 2 tbsp of cream over the mashed strawberries.Arrange fresh strawberries over the cream and dust with icing sugar.Chill this for at least 2 hrs and serve.Note: Make sure your cream is 3/4 full. You need space to arrange strawberries on top of it.

Tuesday, November 29, 2011

Pinacolada Carrot Cake Recepi by Chef Foo


Ingredients

180g brown sugar
200g corn oil
4 eggs
1 tbsp vanilla extract
100g walnut (coarsely chopped)
80g shredded coconut
325g canned pineapple ( cut into small cubes)
350g grated carrots
250g self raising flour
3g salt
5g bicarbonate soda
3g ground cinnamon

Lemon Cream Cheese Frosting

250g cream cheese, room temperature
125g unsalted butter, room temperature
1 tsp vanilla extract
125g icing sugar, sifted
1 lemon zest
1 tsp lemon juice
100g chilled heavy whipping cream (double cream) (35-40% butterfat)

Method

For Cake

Preheat oven to 175 degrees Celcius and grease a 9in (23cm round / square) cake tin. Sift flour, bicarbonate of soda and cinnamon into a large bowl. In an electric mixer, lightly beat up the eggs, vanilla and sugar. Pour in the oil into mixer and add in the salt, carrots, coconut and walnuts. Lastly, fold in all the sifted dry ingredients and mix until well combined. Pour into prepared tin and bake for 1 hour or until skewer comes out clean when inserted. Allow to cool before unmoulding.

For Cream Cheese Frosting

In the bowl of your electric mixer, beat the cream cheese and butter until smooth. Add the vanilla and icing sugar and continue to beat until light & slightly fluffy. Mix in the lemon zest and pour in the juice. Using the whisk attachment, gradually add the heavy cream and whip until the frosting is thick enough to spread. Add more cream as needed to get the right spreadable consistency.

Assemble

Slice cooled cake into two layers, spread a thin layer of frosting onto the first layer and sandwiched the remaining layer. Cover the cake with frosting and garnish with marzipan carrots on top and florentine slices at the side or your desire decorations.

Serve chilled.

Monday, October 17, 2011

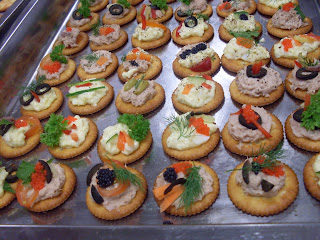
Appetizer for all..... :)


Fresh vegetable 


Cucumber & Carrot


Tuna


Potato


Boiled Egg


Tomato


Vege


Tuna mix with mayo


Egg mix with mayo


Taddaaaaa....... :)


Ready to serve you allsss...  :p


Happy Cooking Everybody......